External IP allows users to allocate the static public IP address to their projects. The static public IP address can be associated to the internal IP address of the instance. Once it is associated to the internal ip address of the instance, it working as NAT (Network Address Translation).
External IP
Benefits

Connect to the worldwide
External ip lets you link allocate the static public ip address and link it to the private ip address of the instance. Network packets go through the external ip was NAT translated. Without external ip address, instance cannot receive the requests from the worldwide.

Flexibility
External ip enables you to change the association between external ip address with each instance. You can allocate new ip address, unlink the old ip address from the instance, map new ip address to the instance, and remove the old ip address from your project.
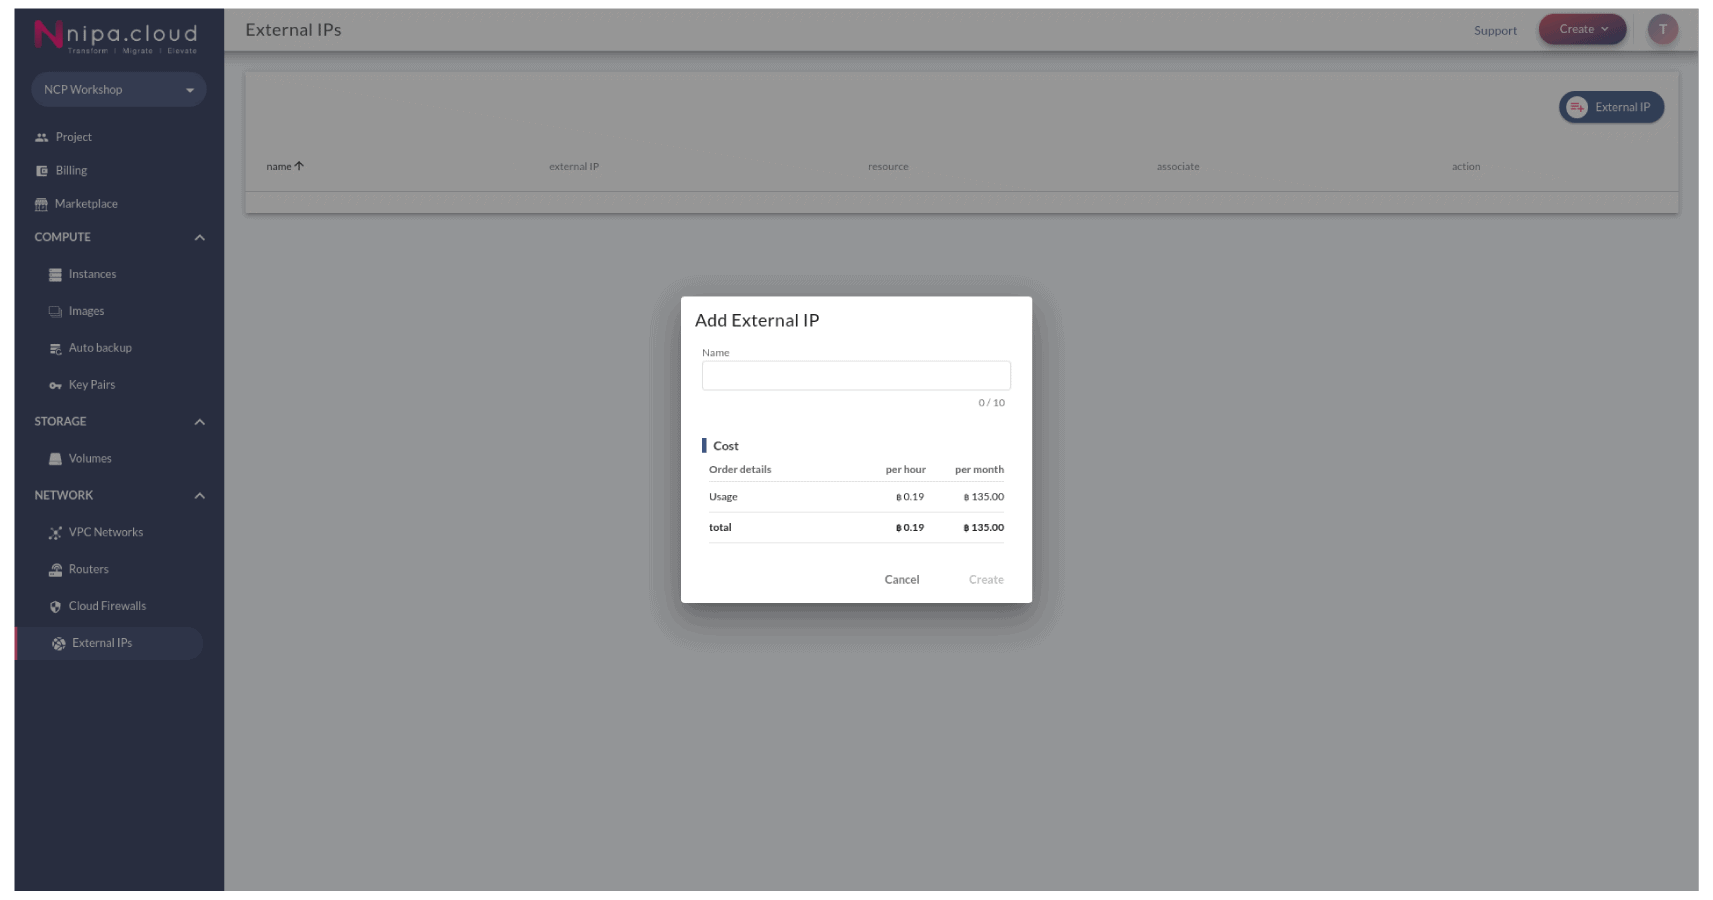
You can allocate new external ip address to your project by using External IPs menu. Click on External IP button on the upper-right of the screen. Set the name and click the create button.

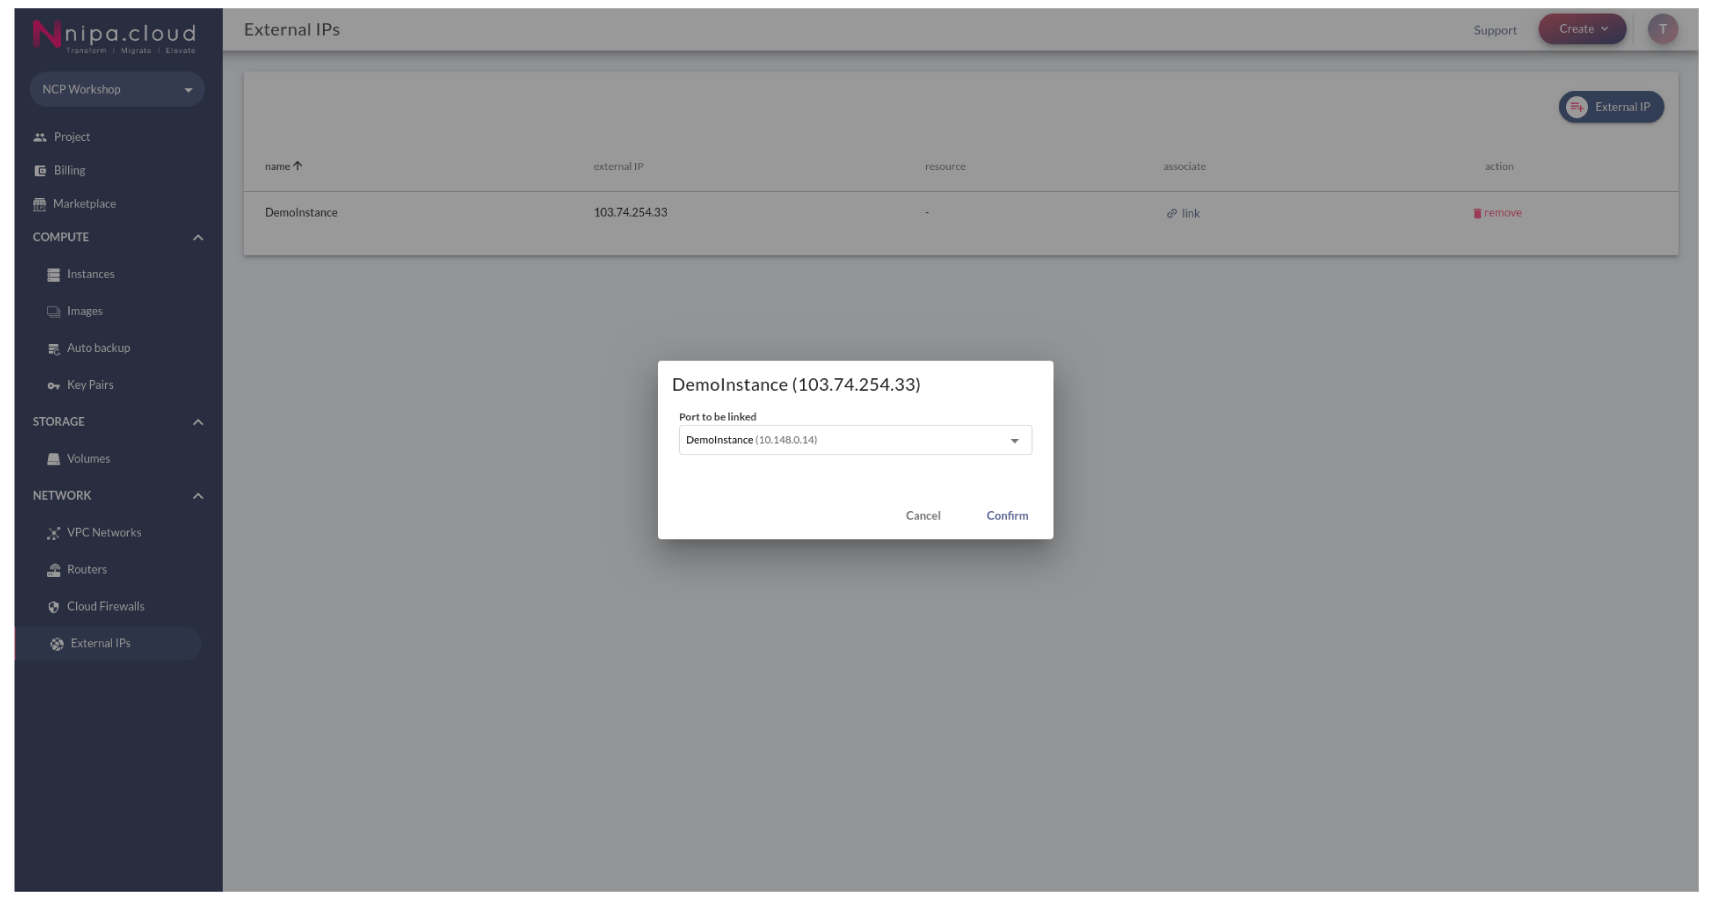
To use the allocated external ip address as ip address of the instance, you have to associate the external ip to the instance. If your instance already has the external ip address, you have to disassociate it first. Open the external ip management page by using the External IPs menu. Click on the link button correspond to the external ip address. Select the instance you would like to assocciate. If your instance has multiple private ip address, you should carefully select the instance name with the target private ip address.

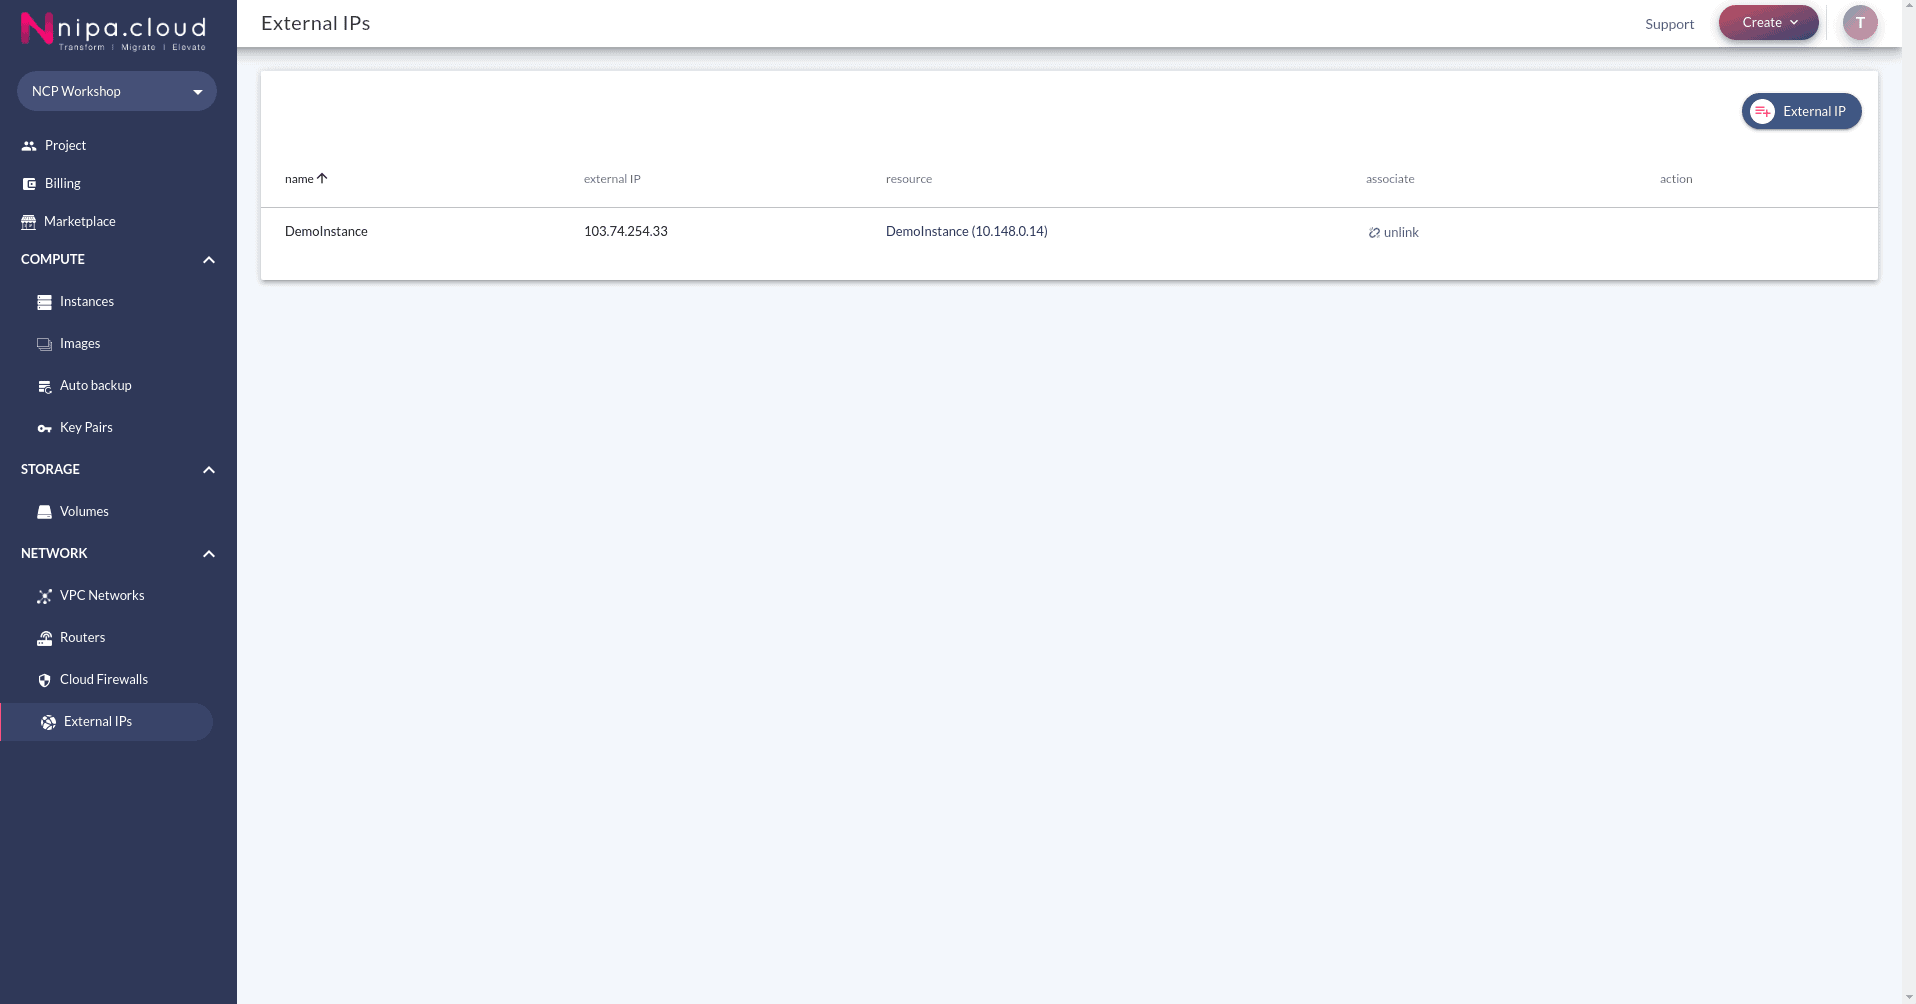
To disassociate the external ip address from the instance, you can using the unlink button on the External IPs menu.

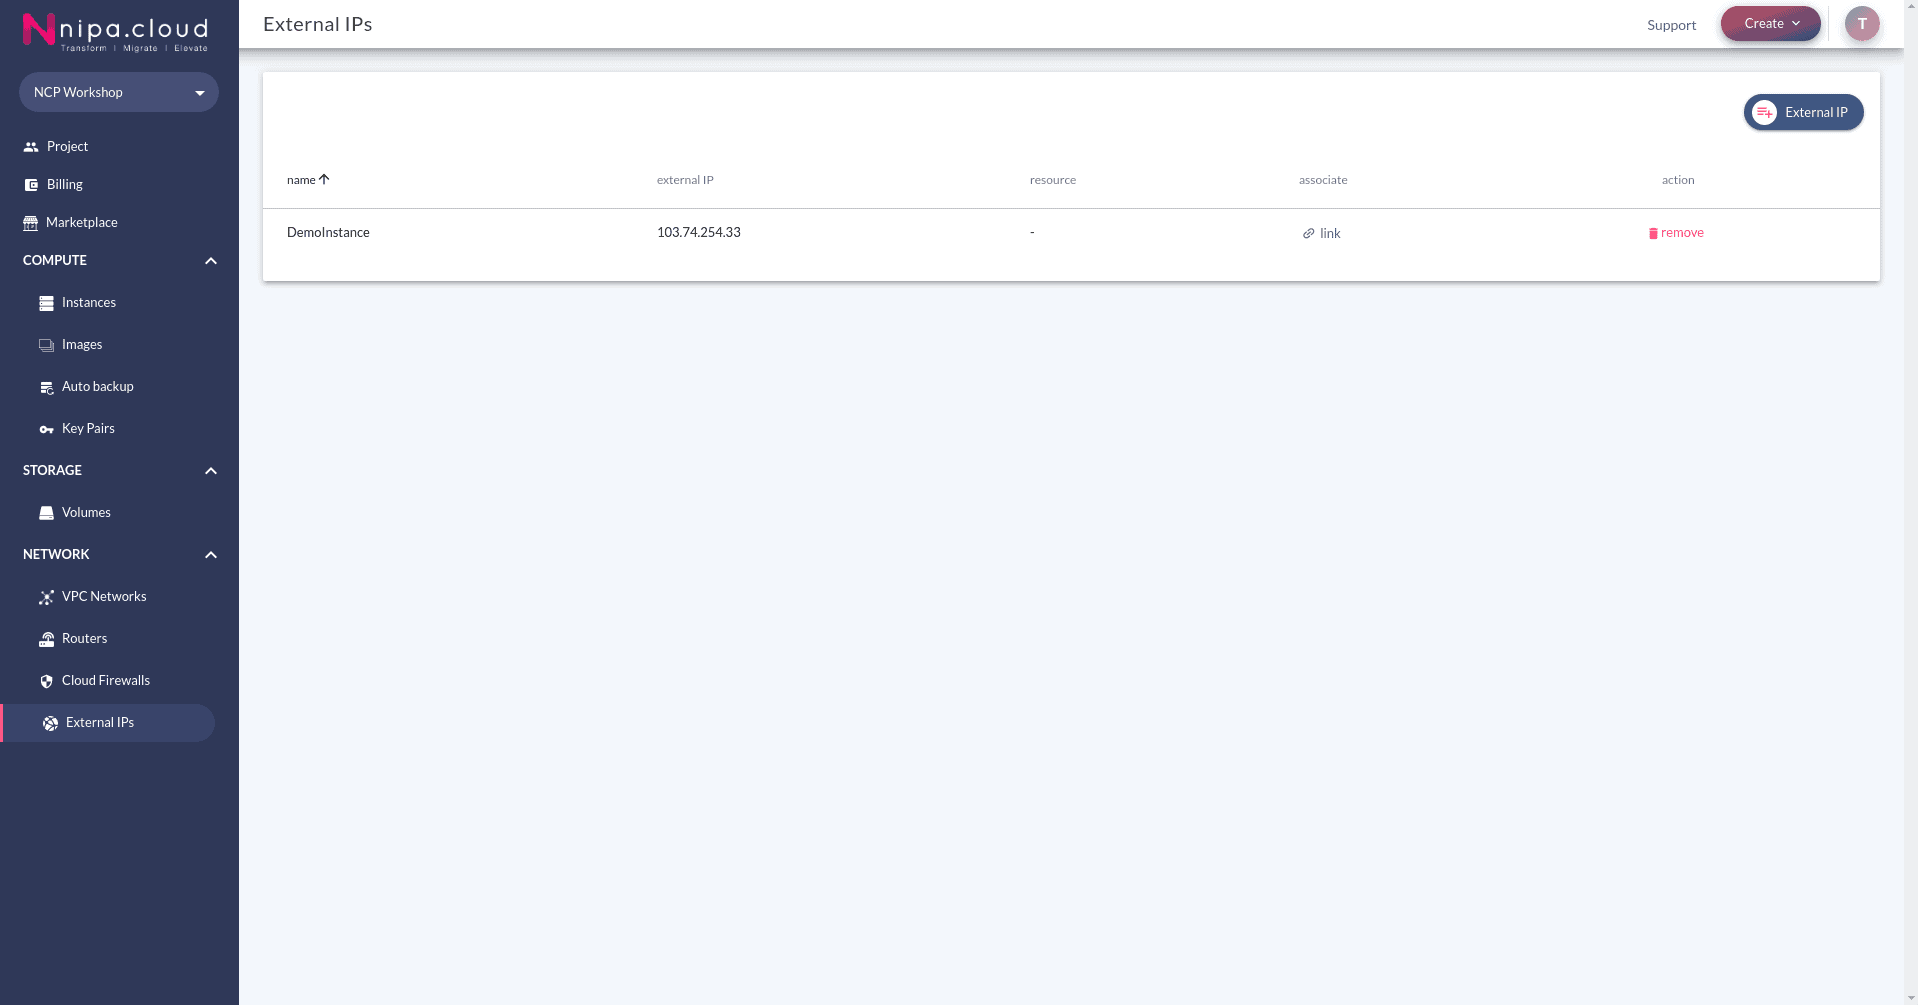
To release the allocated external ip address, you have to disassociate the external ip address from the instance first. Then, click on the remove button correspond to the external ip address.

External IP allows users to allocate the static public IP address to their projects. The static public IP address can be associated to the internal IP address of the instance. Once it is associated to the internal IP address of the instance, it working as NAT (Network Address Translation).
Benefits

Connect to the worldwide
External ip lets you link allocate the static public ip address and link it to the private ip address of the instance. Network packets go through the external ip was NAT translated. Without external ip address, instance cannot receive the requests from the worldwide.

Flexibility
External ip enables you to change the association between external ip address with each instance. You can allocate new ip address, unlink the old ip address from the instance, map new ip address to the instance, and remove the old ip address from your project.
Allocate new ip address
You can allocate new external ip address to your project by using External IPs menu. Click on External IP button on the upper-right of the screen. Set the name and click the create button.

Associate external ip to the instance
To use the allocated external ip address as ip address of the instance, you have to associate the external ip to the instance. If your instance already has the external ip address, you have to disassociate it first. Open the external ip management page by using the External IPs menu. Click on the link button correspond to the external ip address. Select the instance you would like to assocciate. If your instance has multiple private ip address, you should carefully select the instance name with the target private ip address.

Disassociate external ip from the instance
To disassociate the external ip address from the instance, you can using the unlink button on the External IPs menu.

Release external ip address
To release the allocated external ip address, you have to disassociate the external ip address from the instance first. Then, click on the remove button correspond to the external ip address.

Pricing
External ip is not free. You can check the pricing from the external ip pricing page.
